
Transform Your Christmas Tins for Spring


Hi Everyone,
I wanted to show you a quick and easy project that I just completed to
repurpose some old Christmas tins that are no longer my style.


My inspiration was some very pretty scrapbooking papers that
I had found at Hobby Lobby.  There are so many beautiful, interesting
and fun papers to choose from that the possibilities are endless.


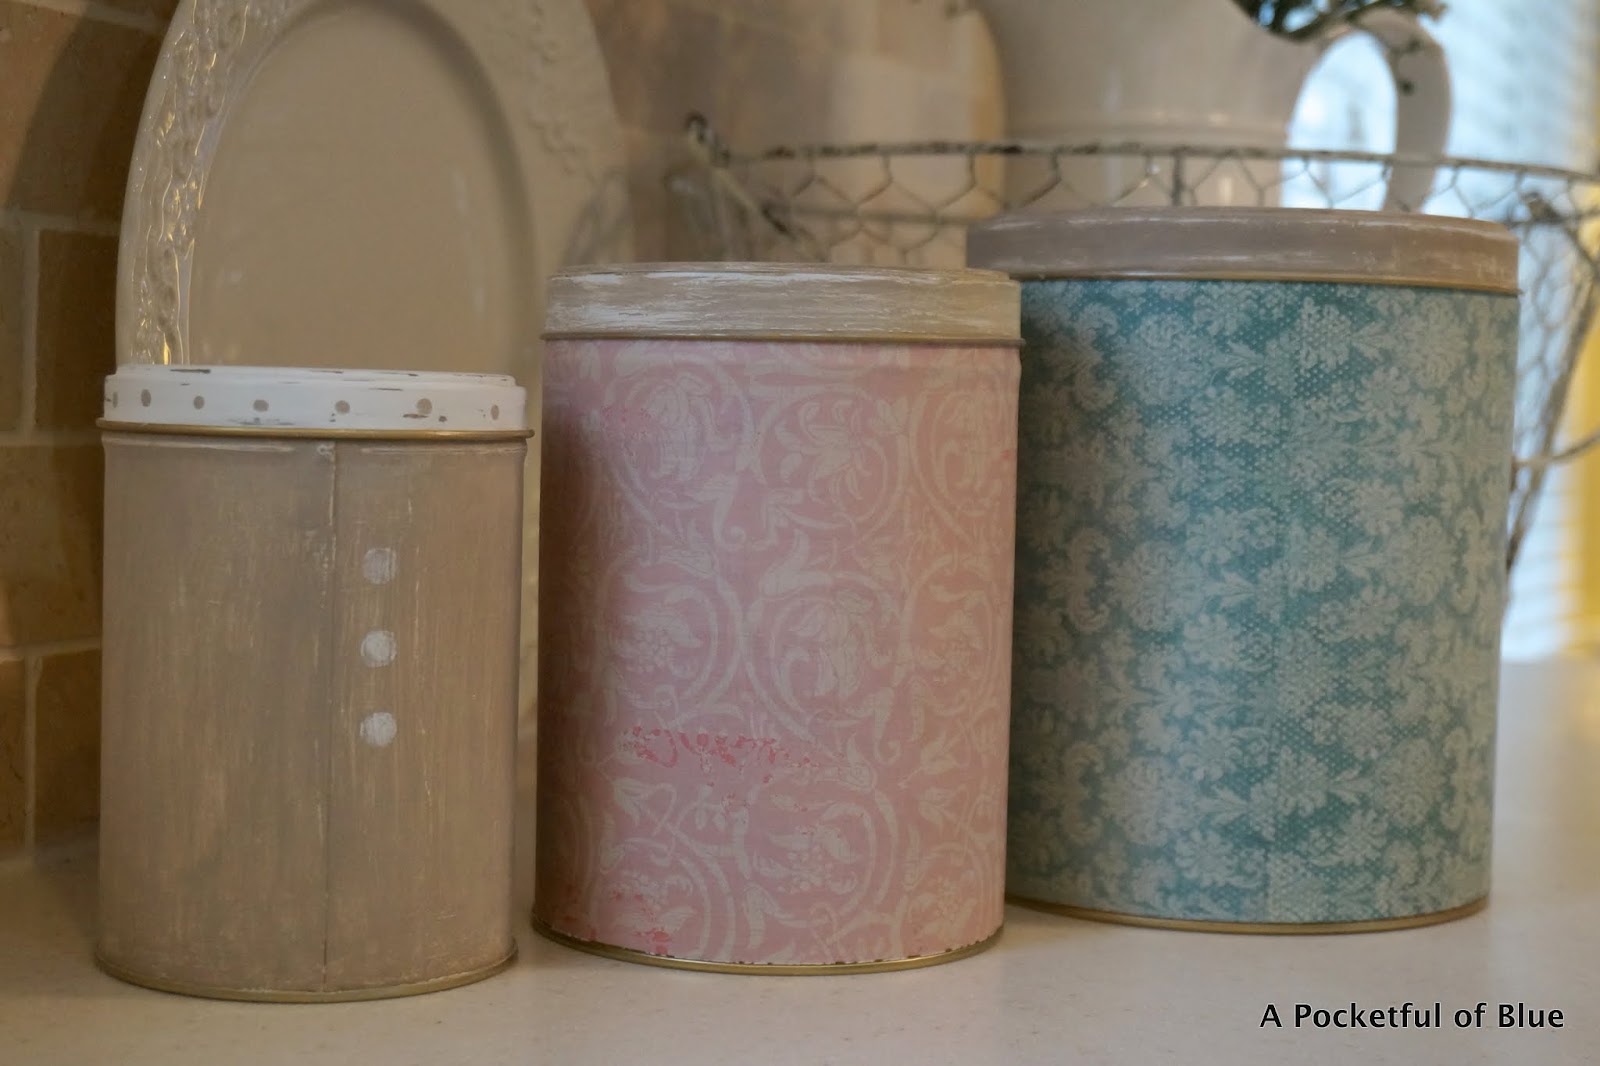
All I did was cut the papers to size to fit around the two larger cans
and attached them with a small amount of white glue.
I painted the lids with chalk paint as well as the smaller can.
Here you can see how they turned out.


As I was editing these photos, child no.2 so lovingly pointed out
that the smaller can looked out of place.
I actually kind of agree with her but that's part of the beauty of this project.
I could repaper or paint over what I have done at any time.
I think they look good enough for now to use for spring and Easter decorating.


There are just so many possibilities of how you could transform these tins.
I think some kind of coordinating labels on the front of them would be a cute idea.


And of course, you can use them to store anything you like.


So if you have some holiday tins that you no longer use,
you can redecorate them very quickly and easily.
Those are the kind of projects I like!

Thanks a bunch for visiting!
                   

- joining -

Comments

  1. That is such a great idea, thanks for sharing.

    ReplyDelete
  2. This is a great idea Jo Anne! Unfortunately my Christmas tins are all packed up in the Christmas boxes in the attic. I'll leave them near the front next year so I can redecorate them throughout the year! Great idea!

    ReplyDelete
  3. What great transformations. It just shows that we don't always have to buy something new.

    ReplyDelete
  4. So cute. Love these. Happy Easter JoAnne.
    Kris

    ReplyDelete
  5. What a great idea! I love the papers you chose for the cans. I actually like how one of the cans is painted instead. It coordinates with the lids of the other cans.

    ReplyDelete
  6. Great idea! There's no limit to what you can do with those pretty papers. You could give someone Easter cookies in one of your new springy tins. :)

    ReplyDelete
  7. I have tons of those tins and no end of scrapbook paper! Now I know what to do with it all! Thanks for the tip!

    ReplyDelete
  8. I need to copy this idea!
    I have painted tins before but never covered them.

    Thank you so much for sharing this with us all at Thoughts of Home on Thursday. We are so glad you are here!

    ReplyDelete
  9. I love new recycling ideas...thanks.
    Happy Easter.

    ReplyDelete
  10. What a transformation! Love how they turned out! Have a great day!

    ReplyDelete
  11. I'm catching up with a few posts that seemed to have slip by me. Some have been read on my phone when it wouldn't let me leave a comment. I love this idea. I've been looking for tins to storage things in our new-to-us trailer and now I know what I will do. I see tins in thrift stores all the time and I can make them just perfect for our new home away from home! Thanks for the inspiration.
    ~Adrienne~

    ReplyDelete

Post a Comment

Popular posts from this blog

Blue Kitchen Cabinets 2017

I have done a couple posts on kitchens with blue cabinetry in the past, after all it is my favorite color. It has been awhile though, so today I have rounded up some more  amazing kitchens with cottage style that also incorporate blue in  the design. source The kitchen above and the one below have white upper cabinets and soft shades of blue on the lower ones. This is a nice way to use blue without going overboard or ending up with something that you would get tired of quickly. source source Finding the right shade of blue would be key and using a lot of white and wood tones along with it creates a beautiful and timeless look. source source Isn't the kitchen above just so very unique? It has sort of a french country feeling but in an updated way. Wish there was a better picture of the script that's on the wall  on the right. source This kitchen is from Remodelondo la Casa and I've always thought the w

AFFORDABLE WALL DECOR

Hi Everyone, One of the things I find the most difficult about decorating is finding wall decor that I like and is also affordable. That is one of the main things that I am always on the hunt for and sometimes I have to come up with some creative ideas. Just yesterday, I found this beautiful image of a  white hydrangea at The Graphics Fairy . The Graphics Fairy I printed it out in a size that would fit in a frame that  I already had.  I think it looks so pretty in the simple white frame. I'm probably going to hang it in our bedroom. I'm making a few small changes in there and I will show you when it's completed. This star is actually from the garden section of our local Meijer store.  It was originally silver metal and I spray painted it white. I have seen a lot of people decorate with bread boards. This one fit perfectly in the narrow space between my  cabinet and window and I love the warmth of the wood.  I love th

Family Room Reveal

Hello Everyone! I've been meaning to post about our updated family room for a very long time and I'm  finally doing it - yeah!! I had been ready to replace our brown leather furniture for a while and when a new Ikea opened very close to us last summer, I jumped at the chance to take a good look at their slipcovered furniture. Originally the plan was to buy another sofa and loveseat like we had but when I  saw the Ektorp sectional on the showroom floor at Ikea, I was sold.   It just seemed so cozy and I could really envision it in our family room. As you can see, we purchased the sectional with the white slipcover. You just can't beat the prices at Ikea and the quality is definitely good enough for us. I'm at a point where I don't want to buy expensive furniture that I feel like I have to keep forever.   We even had the sofa delivered and they took away the old sofa and loveseat  for a very small fee. We purchased this dre